First steps in creating your web service enabled mobile application using JSON, Geronimo, Android and RESTEasy
This articles will reveal the first steps in setting up your development environment for building WebService/Enterprise Java applications and consuming their services from Android device. What I am using in this example:
- Geronimo with Jetty7 javaee5 - 2.2.1 - as application/web server
- Eclipse Indigo EE (with WTP plugin)
- Android SDK 4.0.3
- Google Gson 2.1
- Resteasy - jaxrs - 2.3.1.GA
Please don’t be bored from so many screenshots. If you know the basics you just can skip them. Please also don’t try to rewrite any code from them - source code is available for download at the end of the article.
So first step is to download and setup all these packages. If you are new to Java - then you should start by downloading Java 6 or Java 7 from Oracle Download site.
The proceed with Eclipse EE - download site.
Get Android and follow the instructions to install it and add ADT plugin to your Eclipse IDE.
Download and unpack Google GSon, Reaseasy and Geronimo.
And now is where the fun starts.
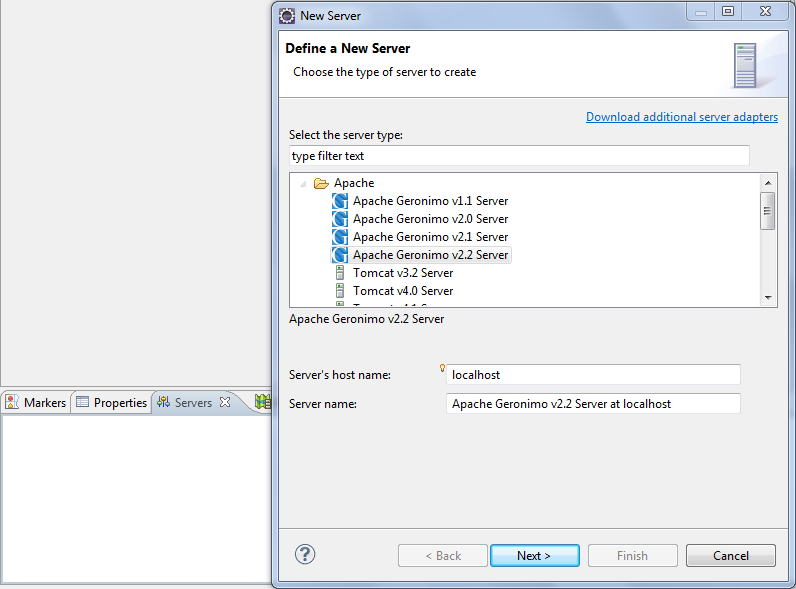
Start Eclipse EE and create your Geronimo server - goto server tab in the bottom panel, righ-click and select New -> Server:
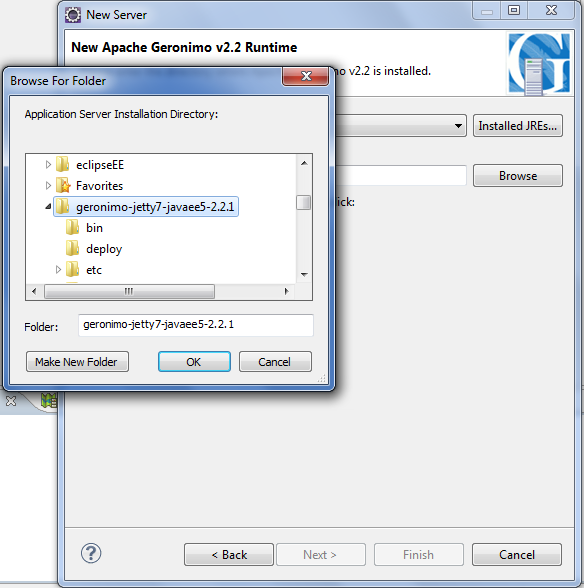
Select the location that you have extracted Geronimo server in:
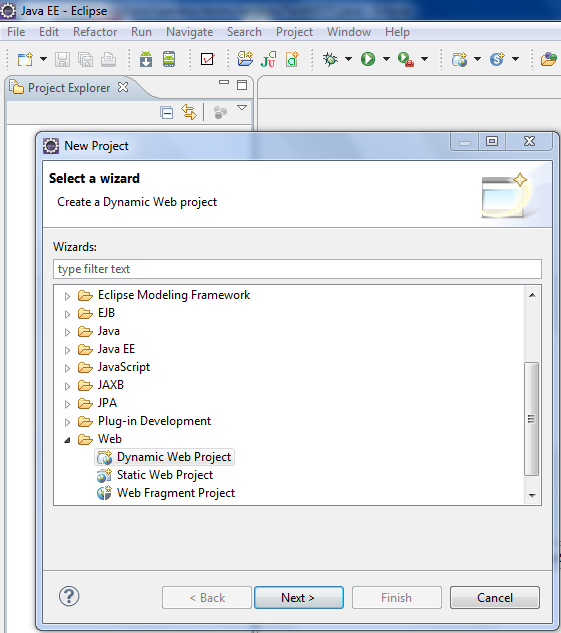
Create a new Web -> Dynamic Web Project.
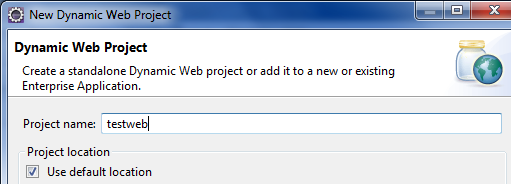
Set the web project name and make sure to select target server to Apache Geronimo server that you have created
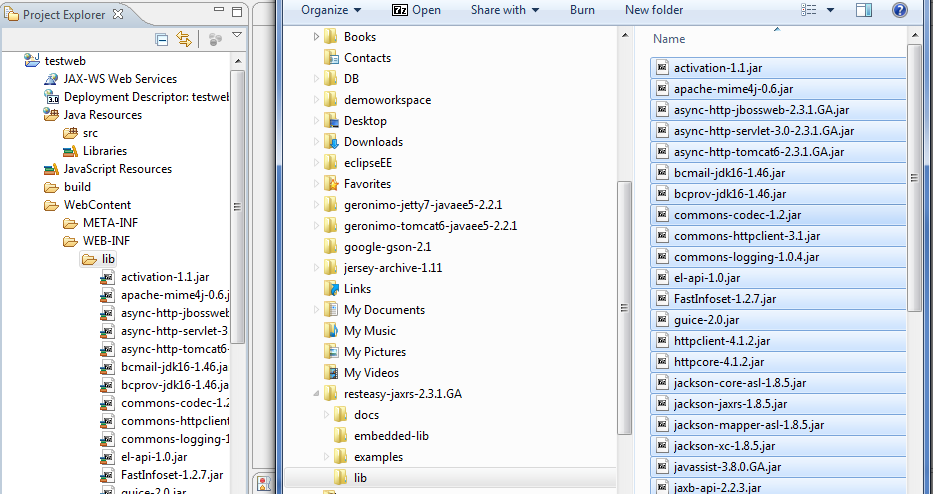
Now we should import Resteasy libraries into our Web Project - just get the libs from the location that you have extracted resteasy package and drop them into <strong>WebContent\WEB-INF\lib</strong> folder in package explorer. When asked - select “Copy” files.
Here comes the fun part.
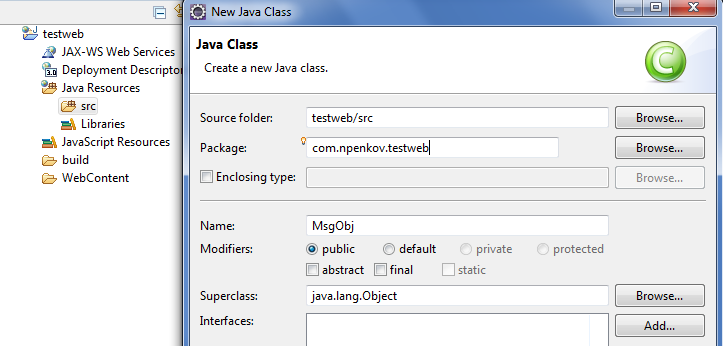
Let’s code the classes. We shall begin with the data container object for our data exchange. We shall create a simple bean (MsgObj) that will contain 2 attributes - id and msgText.
package com.npenkov.testweb;
import javax.xml.bind.annotation.XmlAttribute;
import javax.xml.bind.annotation.XmlRootElement;

@XmlRootElement(name = "msg")
public class MsgObj {
	private int id;
	private String msgText;

	@XmlAttribute
	public int getId() {
		return id;
	}
	public void setId(int id) {
		this.id = id;
	}

	@XmlAttribute
	public String getMsgText() {
		return msgText;
	}
	public void setMsgText(String msgText) {
		this.msgText = msgText;
	}
}
As we have out container, now we shall create the Service class. It will contain just one simple method that will return a new instance of our MsgObj with some data in it.
package com.npenkov.testweb;

import javax.ws.rs.Consumes;
import javax.ws.rs.GET;
import javax.ws.rs.Path;
import javax.ws.rs.Produces;

@Path("/first")
@Consumes({"application/json"})
@Produces({"application/json"})
public class FirstService {

	@GET
	@Path("/tellMe")
	public MsgObj tellMe() {
		MsgObj m = new MsgObj();
		m.setId(1);
		m.setMsgText("Hello, friend!");
		return m;
	}
}
Important for web service (resteasy) is to create the so called`` class, that will know what services we should expose. It is mandatory that it extends javax.ws.rs.core.Application. You should mention here in the constructor that we add our service class to list of web service classes that Application will provide.
package com.npenkov.testweb;

import java.util.HashSet;
import java.util.Set;
import javax.ws.rs.core.Application;

public class WebServicesApp extends Application {
	HashSet <Object> singletons = new HashSet<Object>();

	public WebServicesApp() {
		singletons.add(new FirstService());
	}

	@Override
	public Set<Class<?>> getClasses() {
		HashSet<Class<?>> set = new HashSet<Class<?>>();
		return set;
	}

	@Override
	public Set <Object> getSingletons() {
  		return singletons;
  	}
  }
Time for setting the web.xml descriptor. There we should register Resteasy servlet that will get the requests and execute our web services. If you take a look at the code fragment - we register our Application in parameter javax.ws.rs.core.Application.
   <context-param>
      <param-name>javax.ws.rs.core.Application</param-name>
      <param-value>com.npenkov.testweb.WebServicesApp</param-value>
   </context-param>

   <context-param>
      <param-name>resteasy.servlet.mapping.prefix</param-name>
      <param-value>/re</param-value>
   </context-param>

   <listener>
      <listener-class>
         org.jboss.resteasy.plugins.server.servlet.ResteasyBootstrap
      </listener-class>
   </listener>

   <servlet>
      <servlet-name>Resteasy</servlet-name>
      <servlet-class>
         org.jboss.resteasy.plugins.server.servlet.HttpServletDispatcher
      </servlet-class>
   </servlet>

   <servlet-mapping>
      <servlet-name>Resteasy</servlet-name>
      <url-pattern>/re/*</url-pattern>
   </servlet-mapping>
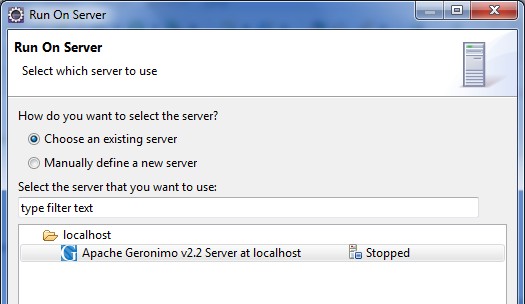
Ready to start the server and deploy out web application. Right click on testweb``` in Package Explorer and right-click there. Then select “Run as” -> “Run on server”. Finish the process.
Wait for Geronimo to boot - you will see lots of messages in “Console” view in the bottom. When it is ready - we can test our small web service. Open your browser and type the following url: http://localhost:8080/testweb/re/first/tellMe

So we are ready now to start consuming web service from our web device. But first we have to write the client code in Android Application.
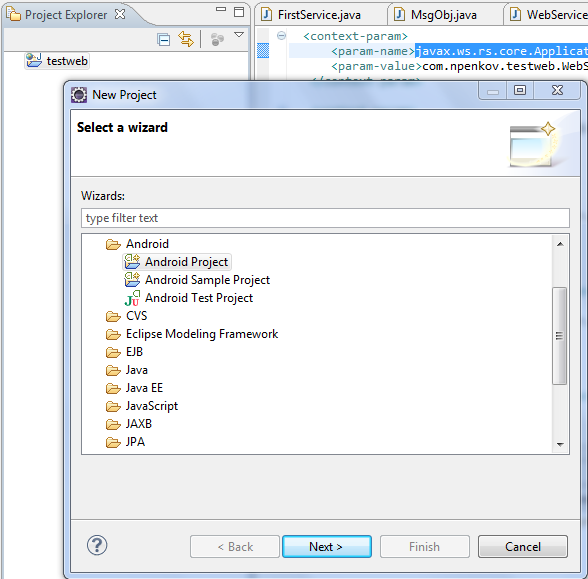
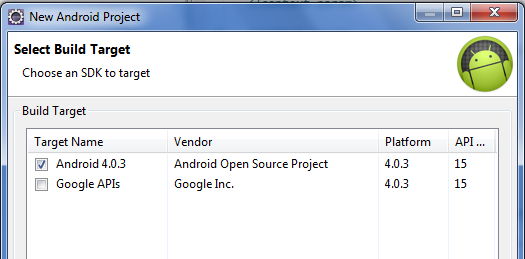
Start by creating new “Android Project”.
Make sure to select the runtime for the project. It might be that you have to consult here with Android Development documentation on how to create Virtual Device.
Continue with defining the main UI elements. We are not going to do something with lots of screens or functionallities - just one screen, with one input box for your WebService server IP address, one area that we will present responses there and finally - a button that will trigger WebService call. So starting with res/layout/main.xml```
<?xml version="1.0" encoding="utf-8"?>
<LinearLayout xmlns:android="http://schemas.android.com/apk/res/android"
    android:layout_width="fill_parent"
    android:layout_height="fill_parent"
    android:orientation="vertical" >
    <LinearLayout
        android:id="@+id/linearLayout1"
        android:layout_width="match_parent"
        android:layout_height="match_parent"
        android:orientation="vertical" >
        <LinearLayout
            android:id="@+id/linearLayout2"
            android:layout_width="match_parent"
            android:layout_height="wrap_content" >
            <TextView
                android:id="@+id/lblIPAddress"
                android:layout_width="wrap_content"
                android:layout_height="wrap_content"
                android:text="IP Address" />
            <EditText
                android:id="@+id/editIPAddress"
                android:layout_width="wrap_content"
                android:layout_height="wrap_content"
                android:layout_weight="1" >
                <requestFocus />
            </EditText>
        </LinearLayout>
        <TextView
            android:id="@+id/textView"
            android:layout_width="match_parent"
            android:layout_height="wrap_content"
            android:layout_weight="0.42"
            android:text="TextView" />
        <Button
            android:id="@+id/btnCallService"
            android:layout_width="match_parent"
            android:layout_height="wrap_content"
            android:text="Call Service" />
    </LinearLayout>
</LinearLayout>
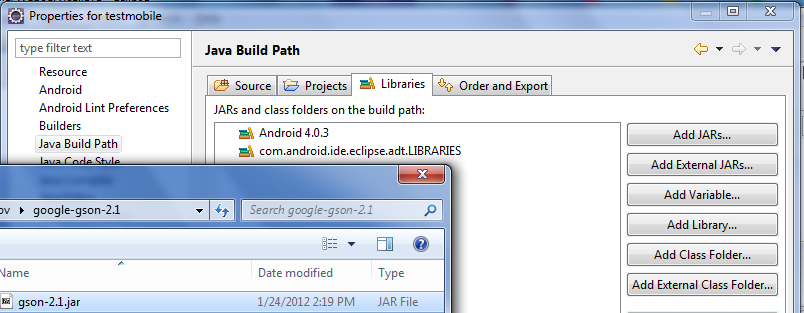
Now we should make sure to have access to google-gson - library that will help us move JSON formatted data into runtime objects. Right-click on Android project -> Properties. And set Java Build Path - add to libraries the jar file that you have extracted from google-gson archive.
Now some more about the WebService call classes and Interfaces. What I did - is to define one class called WebService. This class will be responsible for client <-> server communication. As of several releases - it is not allowed to make Asynchronic Network from main UI Thread - we should separate this logic, and executed in Async Task - means - extends <code>android.os.AsyncTask. If you need more info on Threads in Android - there are great articles and demos on Android Development Web site.
Second major point in our simple architecture, is to define an interface for communication between UI and WebService call. We define the Interface
package com.npenkov.mobile;

public interface ICallbackHandler {
	public void response(String response);
}
In other words - our UI class will implement this interface and pass self instance to AsyncThread. When AsyncThread webservice class finishes his work - he will call implementation method response(String)``` of our UI class to notify about the result. I have to admit here that some of the code for WebService Call - I have copied from Jose C Gomez’s Blog.
Now let us reveal the Mobile Magic. First the declaration of the Activity (main execution View) - we are implementing here two Interfaces. One for listening of Click events (further we should tell to button to send events to this class) and one for listening for responses from Async Web Service call.
package com.npenkov.mobile;

import java.util.HashMap;
import java.util.Map;

import com.google.gson.Gson;

import android.app.Activity;
import android.app.AlertDialog;
import android.content.DialogInterface;
import android.os.Bundle;
import android.util.Log;
import android.view.View;
import android.view.View.OnClickListener;
import android.widget.Button;
import android.widget.TextView;

public class TestmobileActivity extends Activity
		implements OnClickListener, ICallbackHandler {
	private Button btnRunWebService;
	private TextView txtField;
	private TextView txtServerIP;
	private AlertDialog.Builder builder;
The onCreate method is executed in the begging of the Activity execution. There we obtain instances to UI objects from the view. Set that Activity will be the class for listening to Button click events.
@Override
public void onCreate(Bundle savedInstanceState) {
	super.onCreate(savedInstanceState);
	setContentView(R.layout.main);

	builder = new AlertDialog.Builder(this);

	btnRunWebService = (Button) findViewById(R.id.btnCallService);
	txtField = (TextView) findViewById(R.id.textView);
	txtServerIP = (TextView) findViewById(R.id.editIPAddress);

	btnRunWebService.setOnClickListener(this);
}
Next - what should happen when the button is clicked - show confirmation dialog box and start the web service call:
public void onClick(View v) {
	builder.setMessage("Run REST request?").setCancelable(false)
			.setNegativeButton("OK", new DialogInterface.OnClickListener() {
				public void onClick(DialogInterface dialog, int id) {
					dialog.cancel();
					callWebService();
				}
			});
	AlertDialog alert = builder.create();
	alert.show();
}
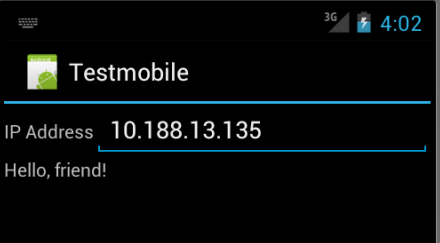
And at the end - the Web Service call and response methods. When we call the service - we will take the IP address from the field that we defined. When we receive a response - a MsgObj - we will deserialize it using Gson and put the message text in the text field on the screen.
private void callWebService() {
	Map<String, String> params = new HashMap<String, String>();
	String serverIP = txtServerIP.getText().toString();
	WebService webService = new WebService(
			"http://"+ serverIP+":8080/testweb/re/first/",
			"tellMe", params, this, WebService.GET_METHOD);
	webService.execute();
}

@Override
public void response(String response) {
	Log.i("callMethod", "response");
	try {
		MsgObj msg = new Gson().fromJson(response, MsgObj.class);
		txtField.setText(msg.getMsgText());
	} catch (Exception e) {
		Log.d("Error: ", "Processing of " + response );
		if (e != null && e.getMessage() != null) Log.d("Error: ", e.getMessage() );
		else if (e != null) Log.d("Error: ", e.toString());
		else Log.d("Error: ", "Null Exception");
	}
}
At last we should enable our application to call web services on Internet. For almost all resource like operations, you should inform Android OS that you request this permission. If not - you will not have access to these services. So open your AndroidManifest.xml``` and add the following line
<uses-permission android:name="android.permission.INTERNET"></uses-permission>
We are ready to test our application. Make sure Geronimo is running. Right click on testmobile``` project and execute it (“Run As” -> “Android Application”).
Obtain your IP address by executing command ipconfig if you are on Windows machine. And ifconfig if running MacOS or some UX type of OS.
Write down the address and push the button on your Android Emulator:
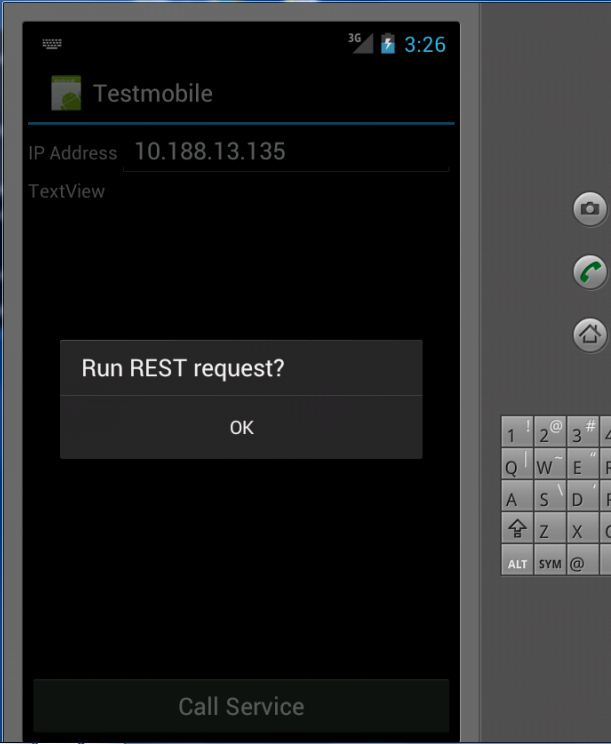
When you confirm this message box - you should see the message text from Web Service into text field that we defined on the screen:
- Here you can download source code for Android application.
- And here you can download source code for WebService application.
Follows an article to do the same app, but on iOS.
~Enjoy