First steps in creating Web service JSON enabled iOS application
This article continues the series for creating a web service consuming program on your mobile device. In the previous article I have showed you how to create Server part (web service) on Geronimo and how to access it from Android app. Now we shall do the same with iOS application.
So what do you need.
- Mac with OSX
- XCode IDE with iOS SDK
- Code and applications (server, IDE, code) from previous article in order to run the server
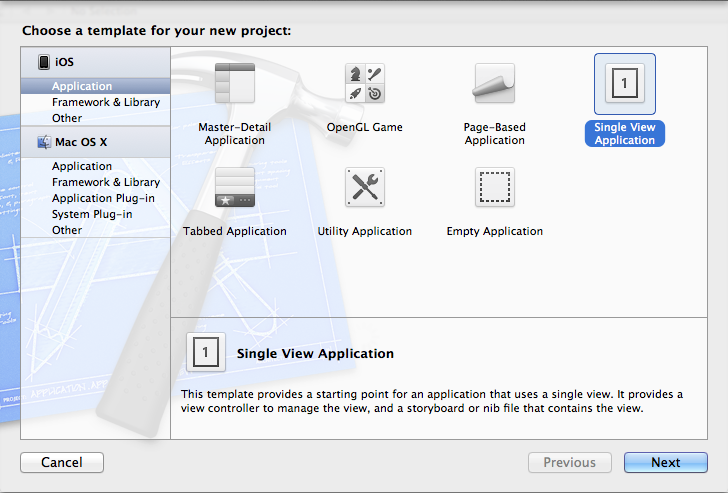
So lets start. First create iOS Project - I prefer here to use “Single View Controller” template:
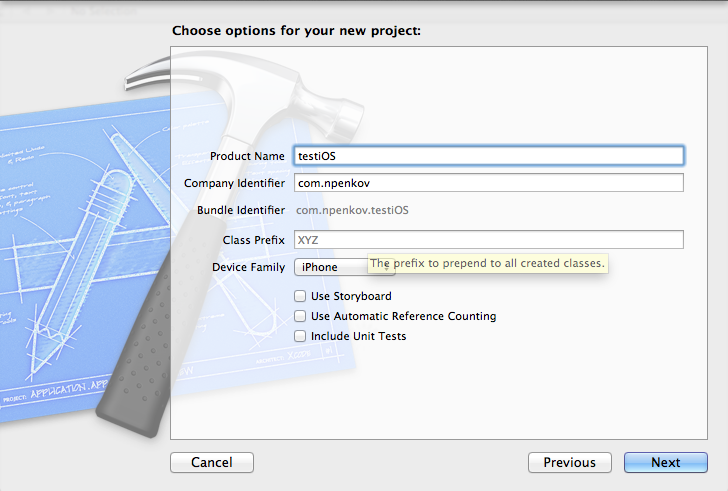
Then put you properties for the new project:
Now we shall define UI variables that we shall use. Open ViewController.h and modify it like shown bellow
#import <UIKit/UIKit.h>

@interface ViewController : UIViewController {

    IBOutlet UITextField *txtIPAddress;
    IBOutlet UITextView *txtDisplayArea;
    IBOutlet UIButton *btnRunWebService;

}

@property (nonatomic, retain) UITextField *txtIPAddress;
@property (nonatomic, retain) UITextView *txtDisplayArea;
@property (nonatomic, retain) UIButton *btnRunWebService;

- (IBAction)runWebServiceAction:(id)sender;

@end
Here we define the same controls that we used in Android demo - one TextField for entering IPAddress of the server, one TextView where we should display the response from server and a button, that will trigger web service call. I will not describe why and how Objective-C is used to define these - there are plenty of books and demos on the net to find this out.
Next we shall create the UI in out ViewController.xib. Open it and draw the controls shown on screenshots, using drag and drop from your right-bottom panel with Library controls:
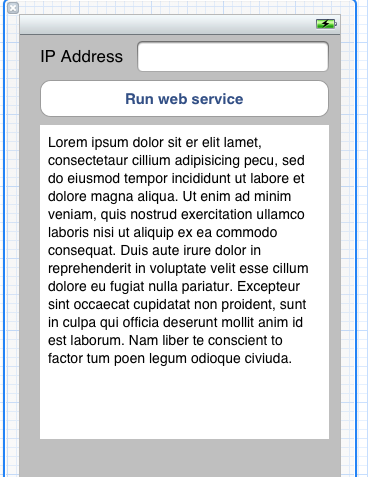
The next step is to create the binding UI <-> Class implementation. Open the tree with controls, right click on “Placeholders” -> “File’s Owner” and drag to TextField (IPAddress). Xcode will offer to connect it to attribute txtIPAddress. Repeat this for TextView (area) and for the button. Now do the reverse operation - drag from Button to “File’s Owner” in order to connect the Push button operation to method that we defined in ViewController.h.
Now we shall define the value class MsgObj with 2 attributes - id and message text.
MsgObj.h
#import <Foundation/Foundation.h>

@interface MsgObj : NSObject {
    NSNumber *msgId;
    NSString *msgTxt;
}

@property (nonatomic, retain) NSNumber *msgId;
@property (nonatomic, retain) NSString *msgTxt;

- (id)initWithJSON:(NSDictionary*)dataDict;

@end
MsgObj.m
#import "MsgObj.h"

@implementation MsgObj

@synthesize msgId;
@synthesize msgTxt;

- (id)initWithJSON:(NSDictionary*)dataDict{
    if (self = [super init]) {
        self.msgId = [dataDict objectForKey:@"id"];
        self.msgTxt = [dataDict objectForKey:@"msgText"];
    }

    return self;
}

- (void)dealloc{
    [msgId release];
    [msgTxt release];
    [super dealloc];
}

@end
What we do here is to define constructor initWithJSON that we will use to create with objects, when we receive data from web service call.
We are ready to program the call know. First put the following line on the top of ViewController.m. This will define macro for async call queue:
#define kBackGroudQueue dispatch_get_global_queue(DISPATCH_QUEUE_PRIORITY_DEFAULT, 0)```

Then we should "synthesize" the attributes just after the class implementation definition:

```objc
@implementation ViewController

@synthesize txtDisplayArea;
@synthesize txtIPAddress;
@synthesize btnRunWebService;
We should not forget to manage the memory - define the dealloc method
-(void)dealloc {
    [txtIPAddress release];
    [txtDisplayArea release];
    [btnRunWebService release];

    [super dealloc];
}
At the end - we will put the call to web service. There we use the TextField to obtain the server IP address, and to execute the call in Async call, using the macro we defined before:
- (IBAction)runWebServiceAction:(id)sender {
    NSString *ipAddress = [txtIPAddress text];;
    NSString *urlString = [NSString stringWithFormat:@"http://%@:8080/testweb/re/first/tellMe", ipAddress];
    NSLog(@"Call URL: %@", urlString); //3
    NSURL *url = [NSURL URLWithString:urlString];
    dispatch_async(kBackGroudQueue, ^{
        NSData* data = [NSData dataWithContentsOfURL: url];
        [self performSelectorOnMainThread:@selector(receiveData:)
                               withObject:data waitUntilDone:YES];
    });
}
Here we also have set that when response is received - it will be received in method receiveData:
- (void)receiveData:(NSData *)responseData {
    //parse out the json data
    NSError* error;
    NSDictionary* json = [NSJSONSerialization
                          JSONObjectWithData:responseData
                          options:kNilOptions
                          error:&error];
    MsgObj *msg = [[MsgObj alloc] initWithJSON:json];
    [txtDisplayArea setText:[msg msgTxt]];
}
When we receive data - we parse it to JSON and construct our MsgObj. At the end we show the result by setting TextView with text contained in the message.
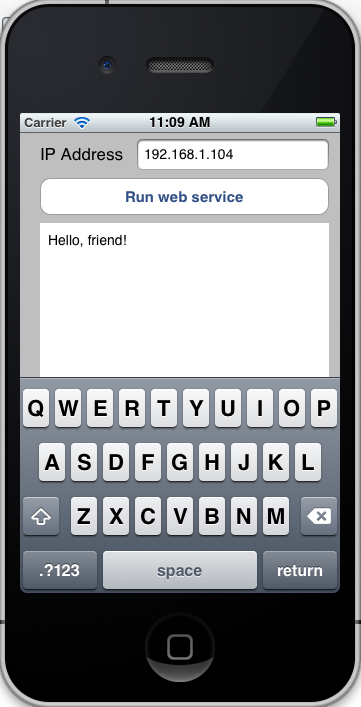
When you run this it will look like:
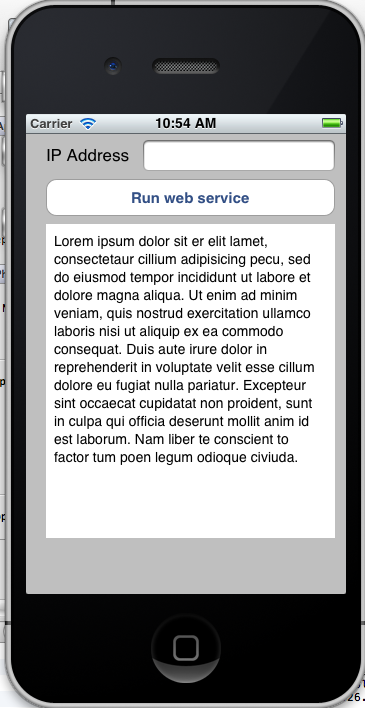
Obtain your IP address by typing ifconfig into Terminal.
Put it in the TextField for IP Address and push the button. (Don’t forget to start the web server and web application before - this you should know from previous article).
You can download source code for this project here.
~Enjoys